
Packer Provisioners: A Warning for Udacity Students
Explore Packer provisioners in our guide, enhancing Udacity's "Deploying a Web Server in Azure" course. Learn to use Packer in Docker and Azure, understanding provisioner timing and service management in different environments. Perfect for students and professionals in DevOps and cloud computing.


Overview
Udacity offers a course called Cloud DevOps using Microsoft Azure. Students are introduced to essential DevOps tools and practices in the Azure Cloud. The class focuses on Terraform, but it also includes a Packer overview, unfortunately, just enough to create an image to deploy with our Terraform scripts.
Packer is a powerful tool, and the class explains only the basic features, just enough to create a simple image to deploy with Terraform. The videos give an overview of provisioners and correctly explain when they are executed.
However, as a mentor and reviewer, I've observed a recurring error concerning the use of Packer. Correcting this misunderstanding is crucial for anyone aiming to work in this field.
Although the videos are clear about the execution time of the provisioners, the starting code provided in the project will only work if it starts an HTTP Server process. This is a one-of, and no HTTP server will be running when the image is used to create a VM in Azure.
The project instructions give the students the impression that just copying provisioner scripts will be enough to create an image running their website every time a VM is instantiated.
Understanding when provisioners run is critical for anyone using Packer, especially students who could run into unpleasant surprises when applying incomplete knowledge in the real world.
In the rest of this short article, we'll review the basics of Packer and show how to write a simple shell provisioner to configure an image to start an HTTP Server at Boot Time.
Understanding Packer and Its Core Components
Packer is a popular open-source tool for creating identical machine images for multiple platforms from a single source configuration. It enables consistent and repeatable image builds for different services, making it a vital tool in infrastructure as code (IaC) workloads.
A Packer template has three crucial components: builders, post-processors, and provisioners. From them, only the builders are mandatory.
Builders
Builders do most of the heavy lifting. They are responsible for creating the image for a particular service (like AWS, Azure, or Docker). A builder creates a machine for its platforms and then turns it into an image for that service. Builders are platform-specific; hence, we need a different one for each service we want to target.
Provisioners
Provisioners are used to set up the system within the image during its creation. We can install software, change configurations, and prepare the system.
To be precise, the builder will start an instance of the container or VM for the service we requested. Then Packer runs the provisioners on it, and after all the provisioners are run successfully, an image from the instance is created.
We can then use that image to start multiple identical instances on that service. The provisioner won't be rerun when creating instances. The image does not contain the provisioner code, only its side effects. This is why we should use them to install new software, change configurations, etc.
Post-processors
Post-processors run after the builders create the machine images. They are used for operations such as uploading the built images to cloud storage, re-packaging, or adding additional metadata.
In contrast, post-processors come into play after the image is built. They don't affect the content or configuration of the image itself but rather handle tasks related to the final image's deployment or distribution.
Explaining Provisioner Timing: A Practical Example
I often see student submissions that need to be more accurate with Packer provisioners. To clarify this, we'll use an example with the Docker builder:
{
	"builders": [{
		"type": "docker",
		"image": "ubuntu:23.10",
		"commit": true,
		"changes": [
		    "USER www-data",
		    "WORKDIR /usr/www",
		    "EXPOSE 80 443",
		    "LABEL version=1.0",
		    "ONBUILD RUN date",
		    "ENTRYPOINT sleep infinity"
		  ]
	}],
	"provisioners": [{
		"inline": [
			"apt-get update",
			"apt-get install -y busybox",
            "mkdir -p /usr/www",
            "chown www-data:www-data /usr/www",
            "echo 'Hello, World!' > /usr/www/index.html",
			"nohup busybox httpd -f -p 80 &"
		],
		"type": "shell",
		"execute_command": "chmod +x {{ .Path }}; {{ .Vars }} {{ .Path }}"
	}],
	"post-processors": [{
		"type": "docker-tag",
		"repository": "turingtaco/provisioner-demo",
		"tag": "latest"
	}]
}
The choice of Docker allows us to work locally without worrying about the costs associated with Azure (or other commercial cloud platforms). However, the demonstrated concept remains consistent across builders: it's about when provisioners are executed.
The Role of ENTRYPOINT in Docker
Docker stops containers when their primary process (defined by ENTRYPOINT) completes. This behavior differs from virtual machines, where the operating system boots and the machine keeps running.
To keep our Docker container running after building the image, we use ENTRYPOINT sleep infinity. Since this command never terminates, it ensures the container remains active, allowing us to test and verify the results of the Packer build.
The Post-Processor
In line 28th, we used a post-processor. It is just tagging the image for easy identification in Docker Desktop and doesn't impact the behavior of the provisioners.
Demonstration Process
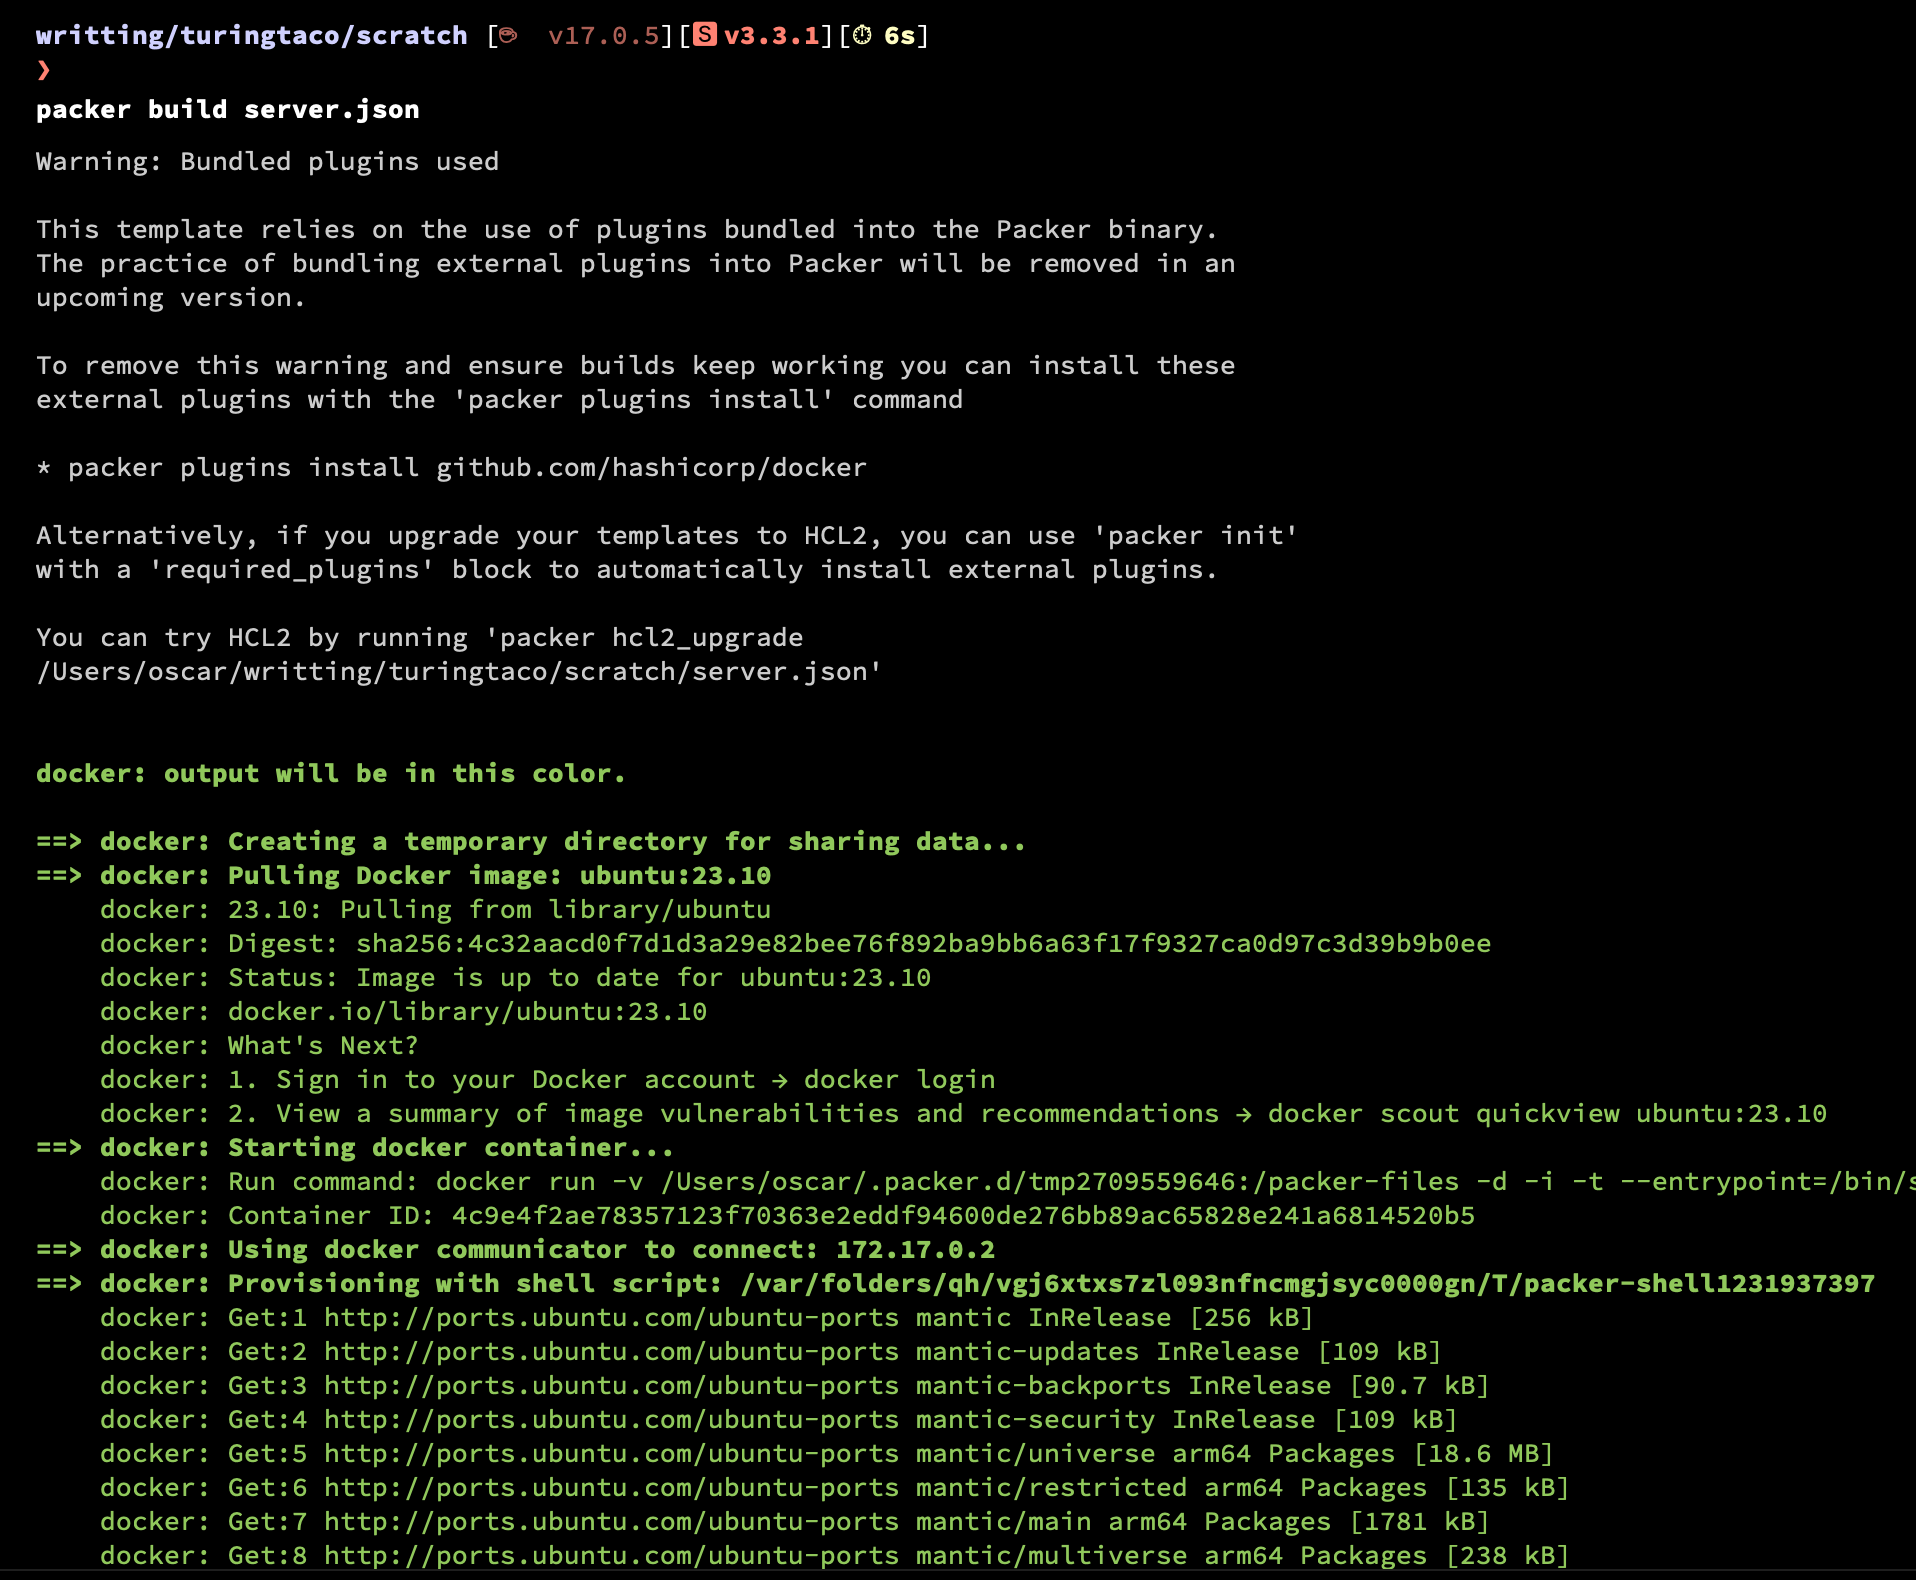
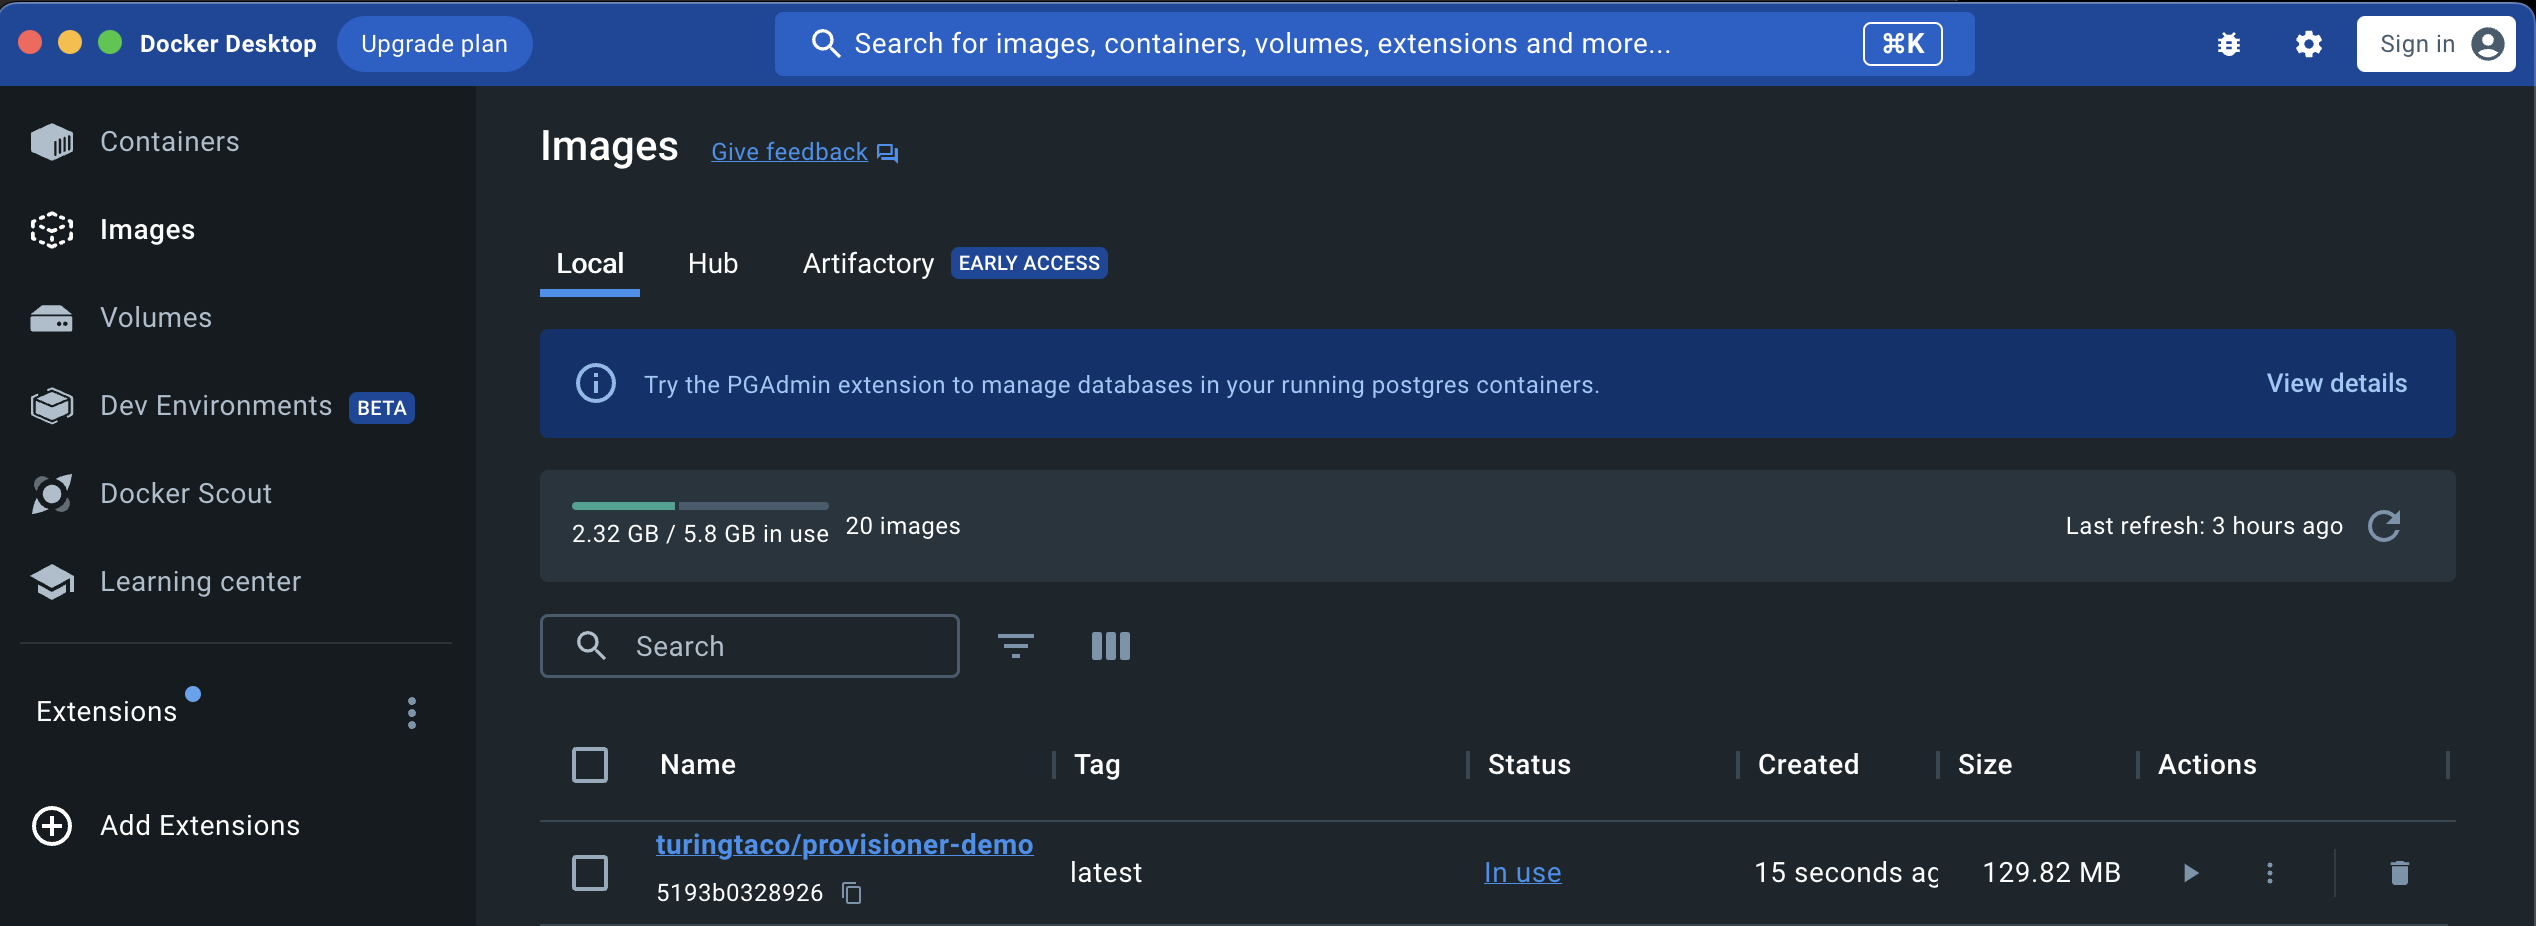
- Build the Image: We build our Docker image with the Packer configuration. The image is conveniently tagged, thanks to the post-processor in our Packer template.
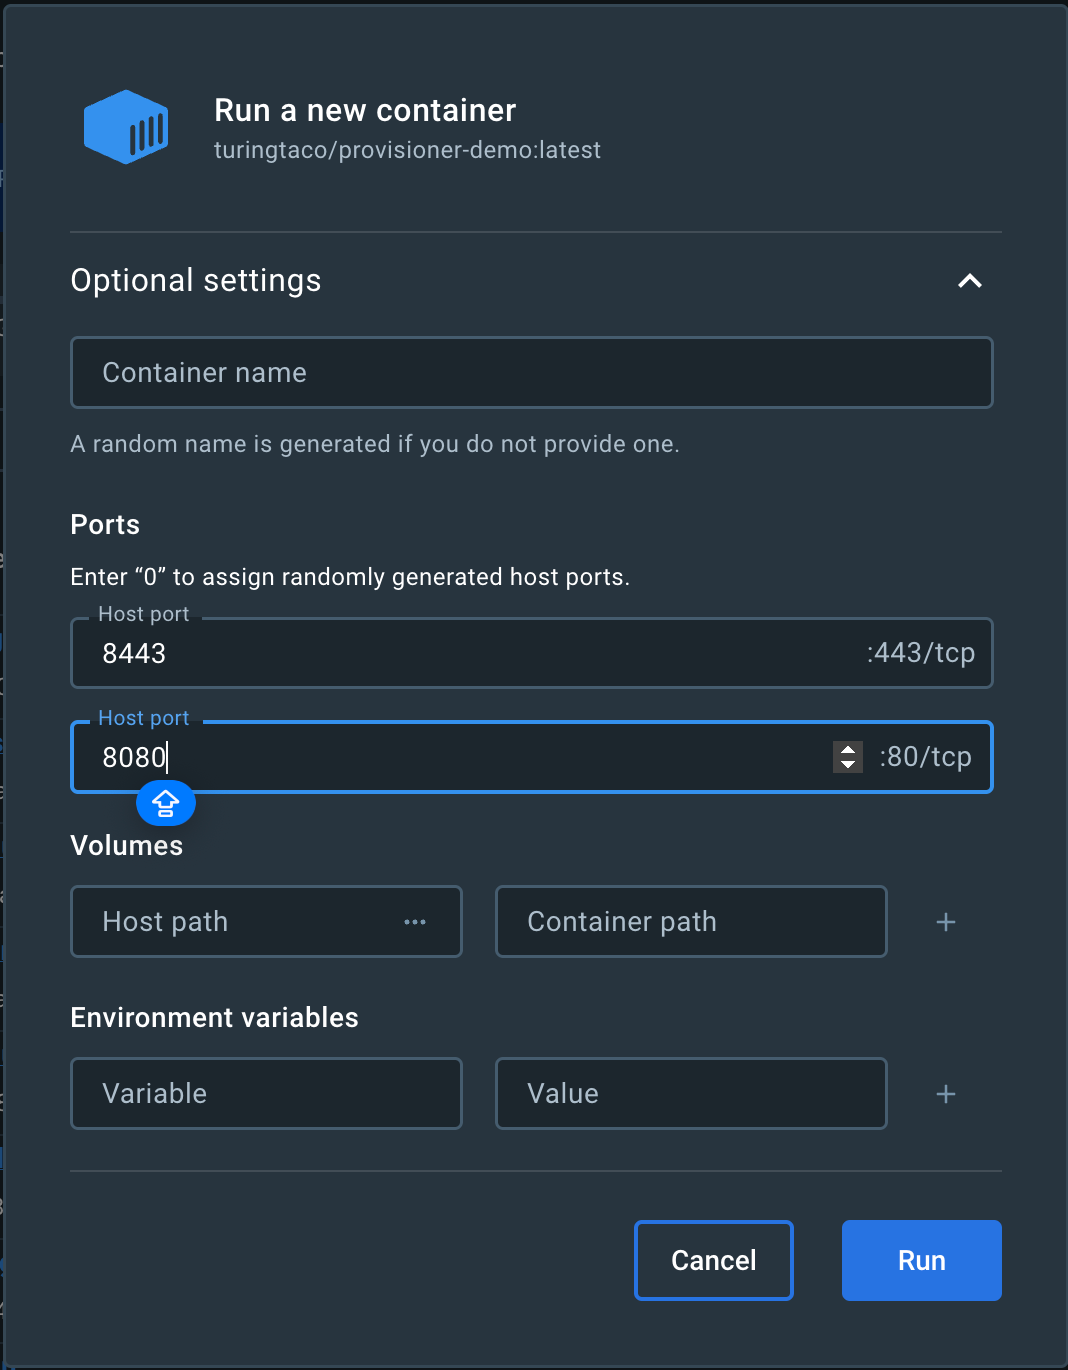
- Start the Container: We start a container from this image:
Forwarding its HTTP port to 8080 on the host. This setup should enable access to the HTTP server set up by our provisioners.
- Initial Check: Attempting to access the HTTP application at
http://localhost:8080, we find the server isn't running:

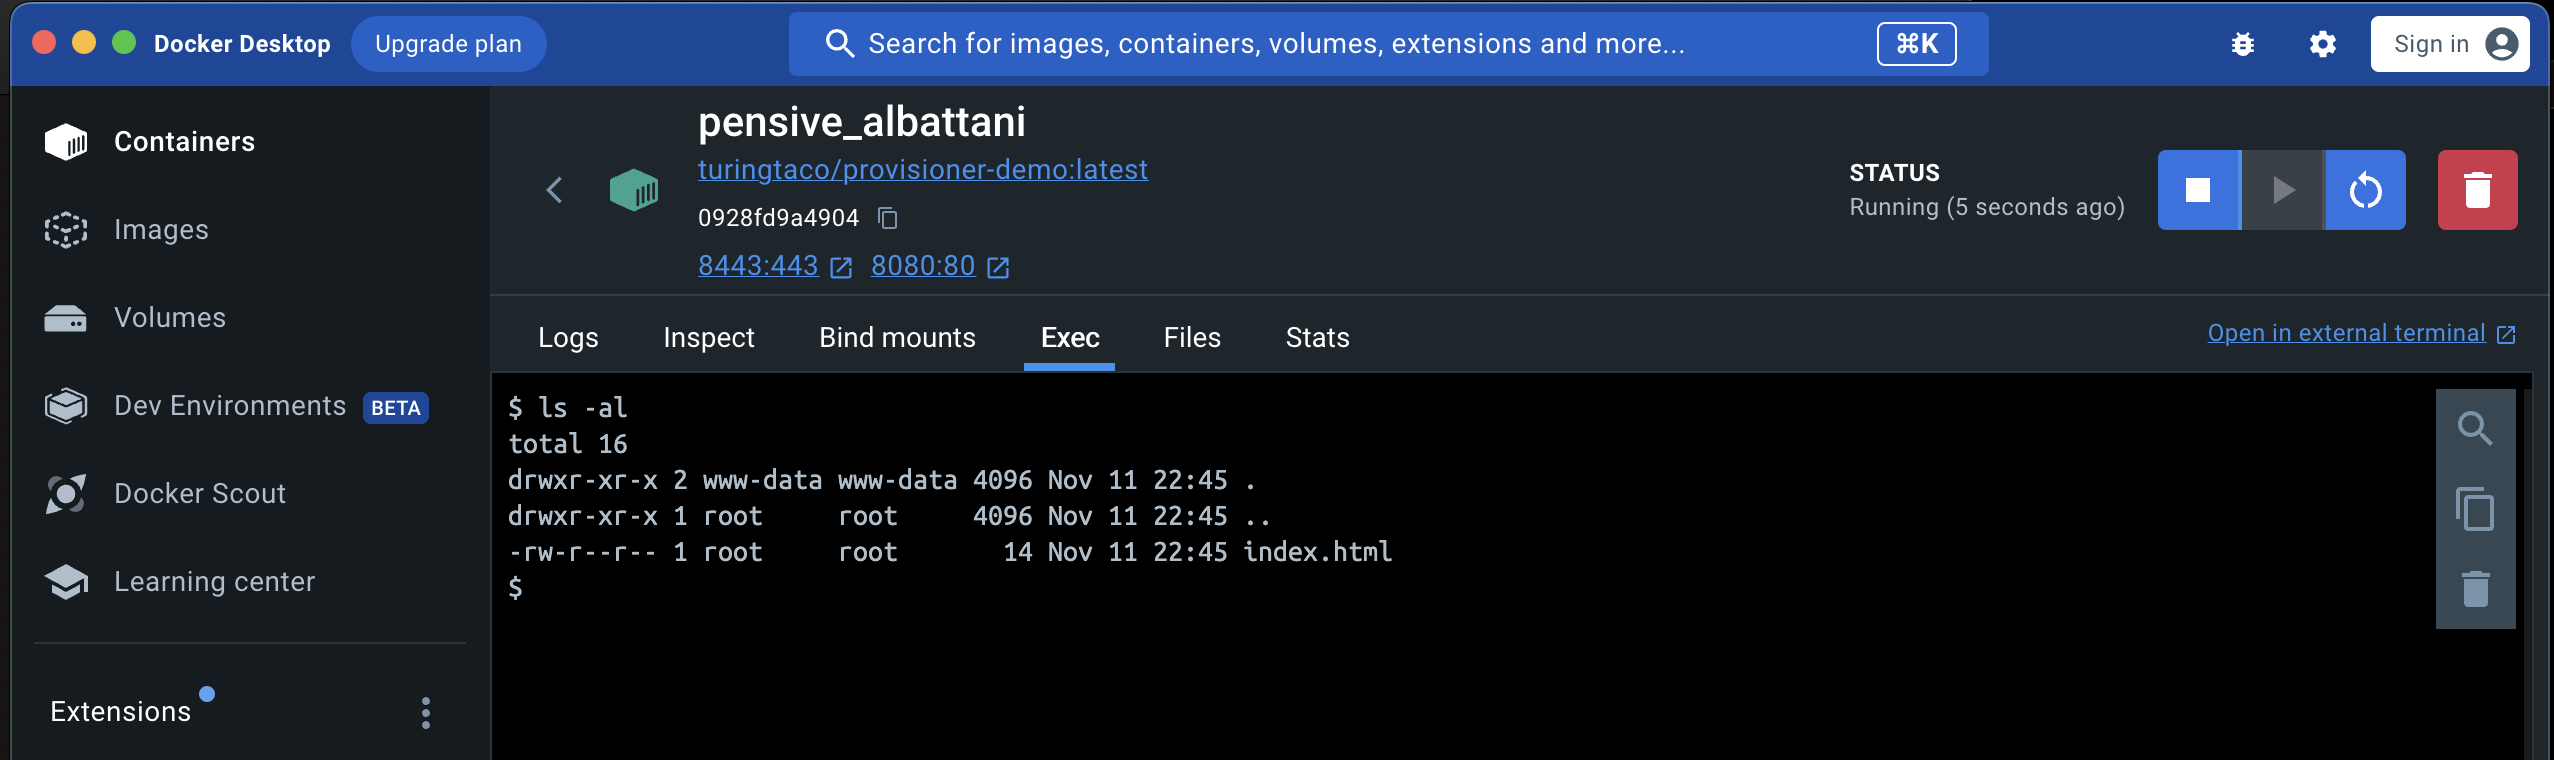
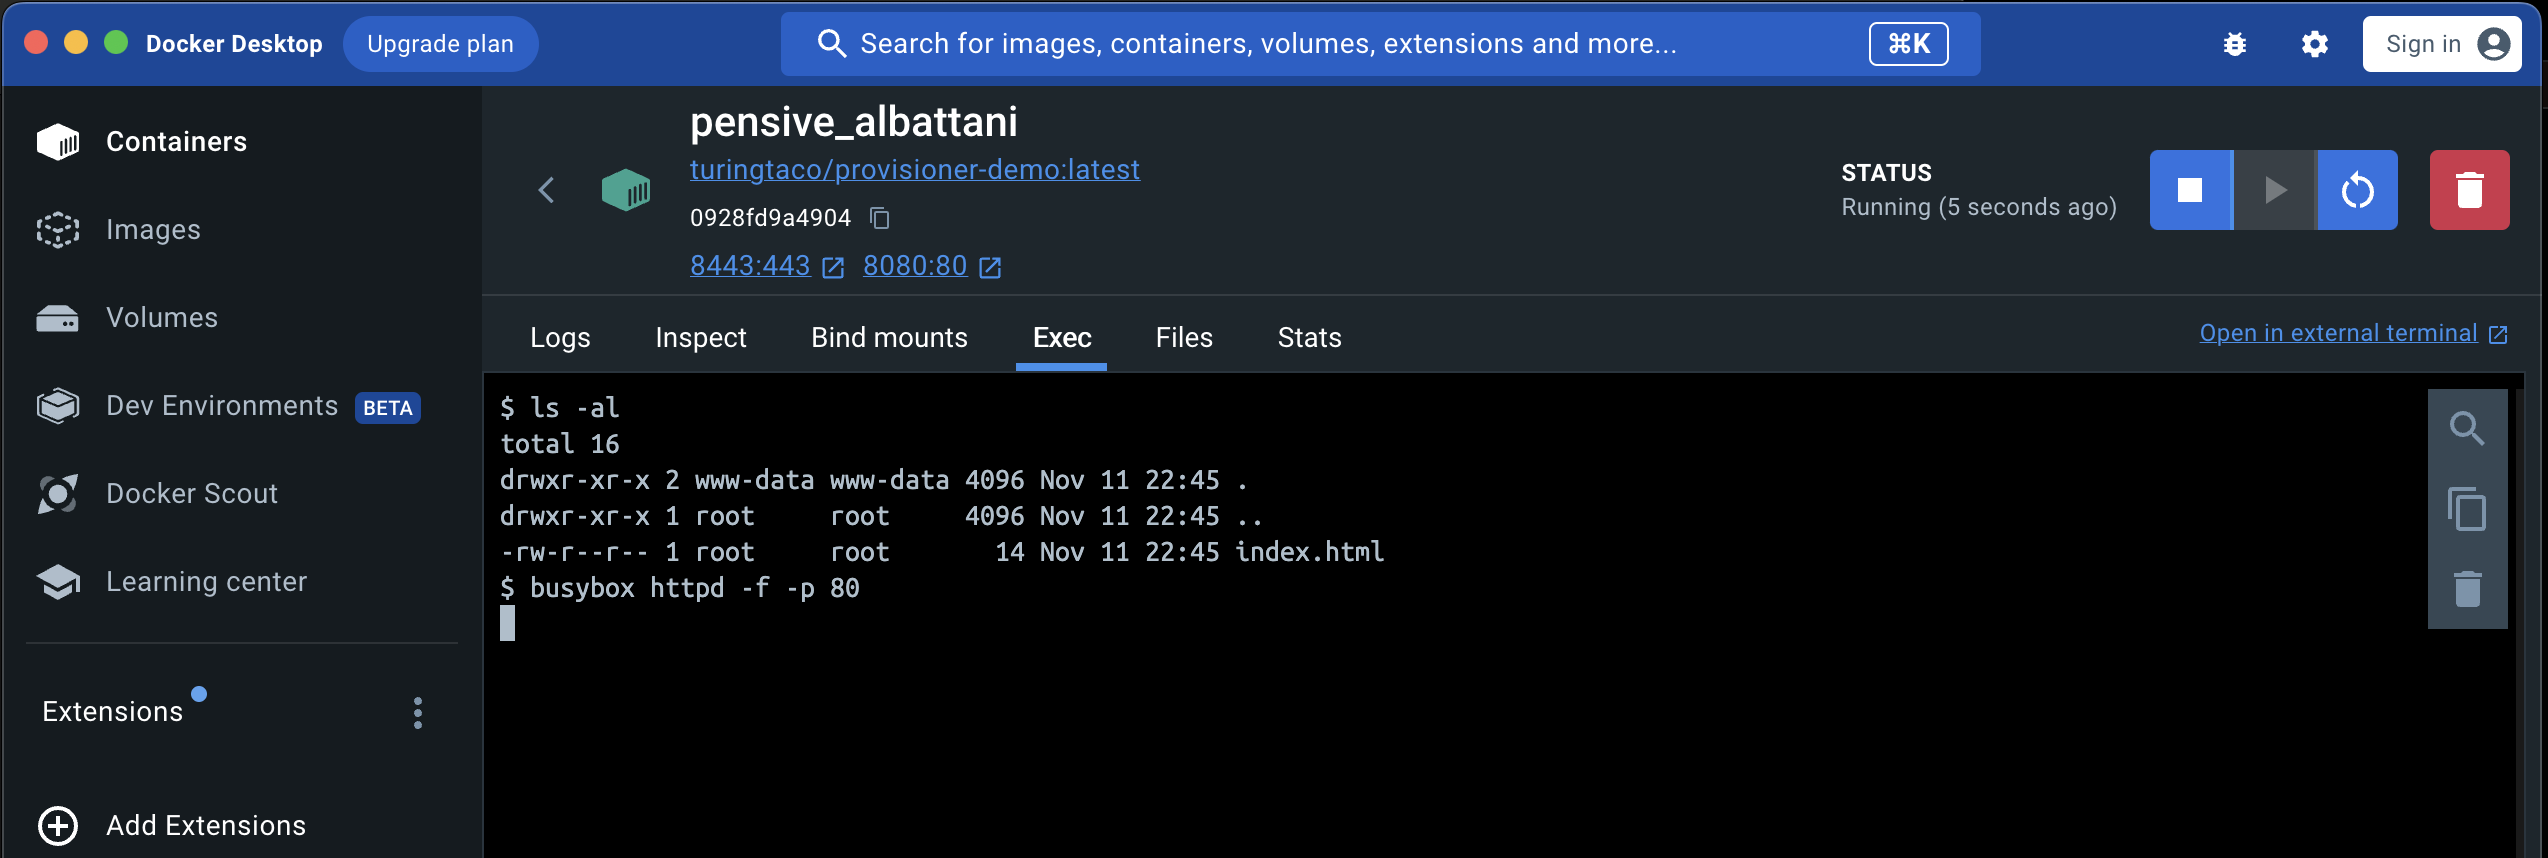
The index.html file confirms that the provisioners did run during the image build process, but the HTTP server they started isn't active:
Why the HTTP Server Isn't Active
This situation illustrates a key point: provisioners in Packer run only during the image-building phase. They do not execute when an instance or container based on the image starts. Therefore, the busybox httpd server created by the provisioner is not active in the running container.
Manual Verification
To further validate this, we manually start the BusyBox HTTP server within the container:
- We access the container's shell.
- Execute
busybox httpd -f -p 80:
- Visit
http://localhost:8080in a browser:
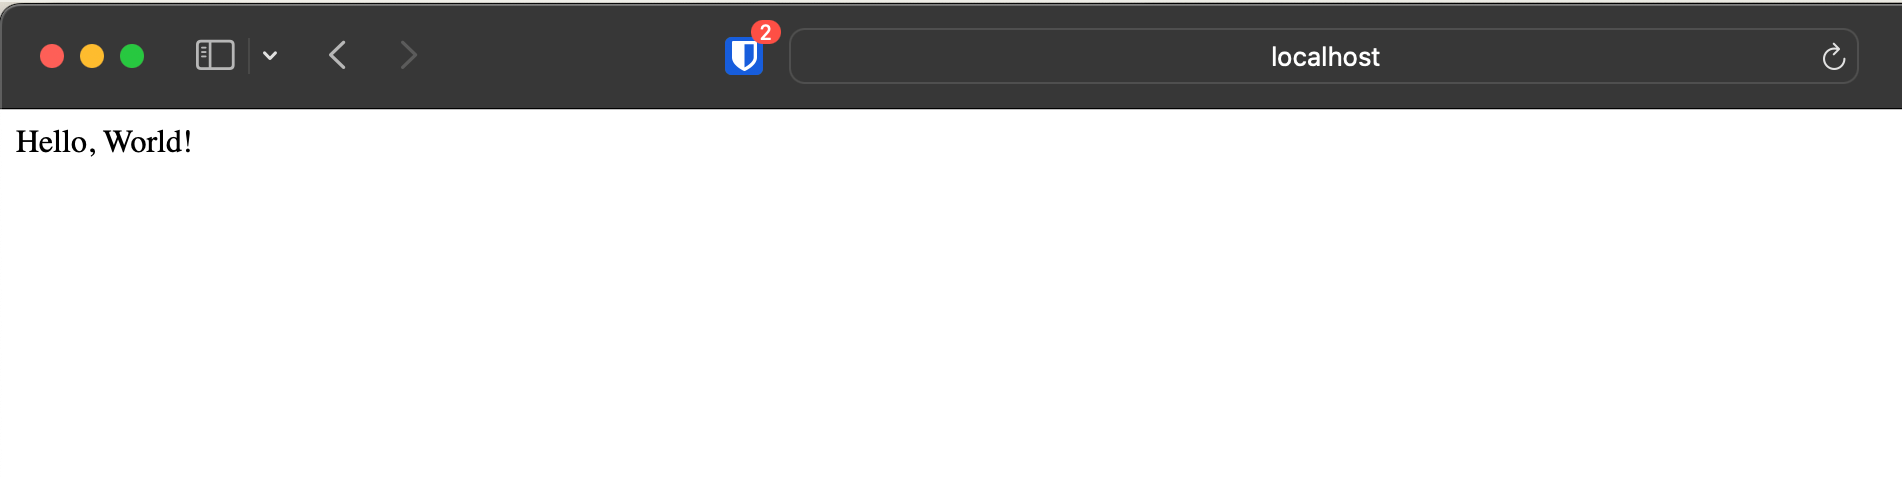
The server is now responsive, confirming that it needs to be started while the container runs, not just during image creation.
How to Use Provisioners Correctly
{
    "builders": [{
        "type": "docker",
        "image": "ubuntu:23.10",
        "commit": true,
        "changes": [
            "USER www-data",
            "WORKDIR /usr/www",
            "EXPOSE 80 443",
            "LABEL version=1.0",
            "ONBUILD RUN date",
            "ENTRYPOINT [\"/usr/bin/supervisord\"]",
            "CMD [\"-c\", \"/etc/supervisor/supervisord.conf\"]"
        ]
    }],
    "provisioners": [{
        "inline": [
            "export TZ=Europe/Berlin",
            "ln -snf /usr/share/zoneinfo/$TZ /etc/localtime && echo $TZ > /etc/timezone",
            "apt-get update",
            "apt-get install -y busybox supervisor",
            "mkdir -p /usr/www",
            "chown www-data:www-data /usr/www",
            "echo 'Hello, World!' > /usr/www/index.html",
            "echo '[supervisord]' > /etc/supervisor/supervisord.conf",
            "echo 'nodaemon=true' >> /etc/supervisor/supervisord.conf",
            "echo '[program:httpd]' >> /etc/supervisor/supervisord.conf",
            "echo 'command=/bin/busybox httpd -f -p 80 -h /usr/www' >> /etc/supervisor/supervisord.conf",
            "echo 'autostart=true' >> /etc/supervisor/supervisord.conf",
            "echo 'autorestart=true' >> /etc/supervisor/supervisord.conf"
        ],
        "type": "shell",
        "execute_command": "chmod +x {{ .Path }}; {{ .Vars }} {{ .Path }}"
    }],
    "post-processors": [{
        "type": "docker-tag",
        "repository": "turingtaco/provisioner-demo",
        "tag": "latest"
    }]
}
Understanding Container-Specific Requirements
Unlike virtual machines, Docker containers do not have a traditional boot process like a complete operating system. They're designed to run a single process and terminate once this process exits. This operational model means that system and service managers like systemd, commonly used in VMs or standalone servers, need to be more suitable for Docker containers due to various compatibility and design issues.
We need a process supervisor to manage multiple processes within a container. In our corrected approach, we have chosen supervisord, a lightweight and efficient solution. Supervisord can orchestrate various background processes in a container environment, making it ideal for our needs.
We would have to deal with an init system in a complete OS environment, like a cloud VM. This could be systemd, openrc, runit, etc. Ubuntu runs systemd by default. If you want to learn how to configure systemd, this article provides a comprehensive guide.
Installing supervisord comes with dependencies, and one requires the Time Zone to be set up; without it, Docker will hang, waiting for the user to input one. That is why we included lines 20x. They are not related to the improved use of the provisioner.
In the provisioner section of our Packer template, we focused on installing the necessary packages (busybox for the HTTP server and supervisor for process management) and setting up the environment.
The critical part is creating a supervisord configuration file. This file specifies how to run the BusyBox HTTP server, ensuring it starts automatically and is managed correctly within the container.
Creating the Image and Running the Container
To demonstrate, we follow the same steps: create the image using Packer, start a container using the image, set the port mappings when starting the container, and then verify.
But in this case, we will be able to access the HTML page directly without having to to go to the container and start the HTTP Server manually:

An Example of the Azure Builder
In the Udacity project, we must use the Azure Builder; however, the principle remains the same; here is an example of how to make it work with the basis of Ubuntu 18th.
{
	"variables": {
        "subscription_id": "{{env `TF_VAR_subscription_id`}}",
		"client_id": "{{env `TF_VAR_client_id`}}",
		"client_secret": "{{env `TF_VAR_client_secret`}}",
        "tenant_id": "{{env `TF_VAR_tenant_id`}}"
    },

	"builders": [{
    "type": "azure-arm",

    "subscription_id": "{{user `subscription_id`}}",
    "client_id": "{{user `client_id`}}",
    "client_secret": "{{ user `client_secret`}}",
    "tenant_id": "{{user `tenant_id`}}",

    "managed_image_resource_group_name": "udacity-devops",
    "managed_image_name": "my-web-server",

    "os_type": "Linux",
    "image_publisher": "Canonical",
    "image_offer": "UbuntuServer",
    "image_sku": "18.04-LTS",

    "azure_tags": {
        "project": "Udacity DevOps - Deploy Webserver to Azure",
        "author": "Chipotle Coder",
        "job": "Webserver"
    },

    "location": "East US",
    "vm_size": "Standard_B1s"
}],
	"provisioners": [{
		"inline": [
			"echo 'Hello, World!' > index.html",
            "echo '[Unit]' > http.service",
            "echo 'Description=HTTP Hello World' >> http.service",
            "echo 'After=network.target' >> http.service",
            "echo 'StartLimitIntervalSec=0' >> http.service",
            "echo '[Service]' >> http.service",
            "echo 'Type=simple' >> http.service",
            "echo 'Restart=always' >> http.service",
            "echo 'RestartSec=1' >> http.service",
            "echo 'User=packer' >> http.service",
            "echo 'ExecStart=/usr/bin/nohup /bin/busybox httpd -f -p 8080 -h /home/packer' >> http.service",
            "echo '[Install]' >> http.service",
            "echo 'WantedBy=multi-user.target' >> http.service",
            "sudo mv http.service /etc/systemd/system",
            "sudo chown root:root /etc/systemd/system/http.service",
            "sudo chmod 755 /etc/systemd/system/http.service",
            "sudo systemctl enable http"
		],
		"inline_shebang": "/bin/sh -x",
		"type": "shell"
	}]
}
Conclusion
In this tutorial, we've clarified the nuances of using provisioners in Packer. The key takeaway is the importance of understanding provisioner execution timing and that we should use them to configure the machine before the image is created. And please remember that any non-persistent changes we make in the provisioners won't be part of the image.
We'll appreciate it if you consider subscribing to our content, and don't hesitate to leave comments. While we appreciate the support of our paying subscribers, we welcome and value the contributions of all members of our community.
So join in, subscribe, comment, and be integral to our shared learning journey!
Addendum: A Special Note for Our Readers
I decided to delay the introduction of subscriptions. You can read the full story here.
If you find our content helpful, there are several ways you can support us:
- The easiest way is to share our articles and links page on social media; it is free and helps us greatly.
- If you want a great experience during the Chinese New Year, I am renting my timeshare in Phuket. A five-night stay in this resort in Phuket costs 11,582 € on Expedia. I am offering it in USD at an over 40% discount compared to that price. I received the Year of the Snake in style.

ReedWeek Timeshare Rental
- If your finances permit it, we are happy over any received donation. It helps us offset the site's running costs and an unexpected tax bill. Any amount is greatly appreciated:
- Finally, some articles have links to relevant goods and services; buying through them will not cost you more. And if you like programming swag, please visit the TuringTacoTales Store on Redbubble. Take a look. Maybe you can find something you like: